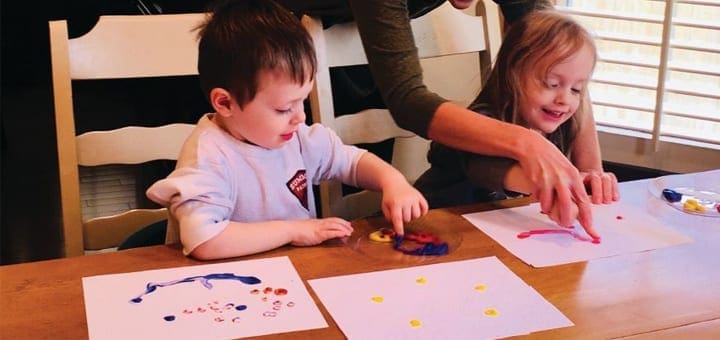
Ready, Set, Paint! Art Therapy at Home

Art therapy is one of those things that applies to all people at all ages and stages. It’s why we all tuned in to watch Bob Ross paint “happy little trees” on PBS. It’s why there is such a thing as a wine and art class where you can don an apron, grab a canvas (and a glass of red wine), and become an artist for the night. It’s why a room without pictures or paintings always feels a little cold.
Art brings life into people and places, and in the case of children with special needs, it encourages them to find a way to express their feelings in a new medium. It moves neurons along in different ways than speech and physical therapy. It’s also chance for socialization with parent, friends, or teachers. It can also be a way to cope with hard situations and it is yet one more link in the sensory processing chain, because art is messy. Being messy takes practices.
The best part about art therapy, however, is that it’s one of the easiest therapies to do at home with your child. You don’t have to be an expert. You just have to be willing to play with the materials at hand.
There are many forms your art could take:
- collages with cutting and pasting for fine motor skills;
- painting for emotion to pick the color that says happy/mad/sad/scared/excited
- puppet shows to work on speech because puppets provide a safe medium in which to practice new words and sounds
- sculpting in clay or Play Dough for sensory stimulus and for working those hand muscles
There are many more, of course, because whatever you throw together with the things you pick off the shelves in your local craft store can become art therapy. One of the favorites in our house involves paint and paper and that’s it. It works on hand-eye coordination and creativity. It also helps kids get comfortable with the feel of the paint.
Connect the Dots
- Supplies:
- Paper
- Washable Paint
- Paintbrush (optional)
1. Gather all your materials and cover your work area with newspaper or a trash bag or tray.
2. Draw dime-sized dots in various places on the paper. Sometimes I do this beforehand and sometimes I let my kids help me make the dots.
3. Dip your child’s finger in the paint color of his or her choosing. If the feel of the paint is too much, use a paint brush and help them hold it.
4. Now connect the dots!
- Encourage vertical, horizontal and diagonal lines to practice midline crossing.
- Get creative: have them make a picture out of the connecting dots (hint: smiley faces, seesaws, shapes, trees, suns, and flowers are all easy ones)
- Talk about the colors they choose: Why did you pick purple this time instead of green? What happens when you mix blue and yellow? Kids with speech difficulties often find it easier to practice talking when they are working on another task.
- Switch hands: this is a great time to practice using the non-dominate hand.
5. Now hang it on the fridge!
Therapy like this is easy and feels more like fun than work. It touches on skills across many disciplines and it gives your child a product at the end that they can be proud of to boost that self-confidence.![]()
Jamie Sumner is a writer and author of the website, The Mom Gene (mom-gene.com) and the mother to a son with cerebral palsy and twins.
You May Also Like
- Art Therapy: How It Works, the Benefits, How to Start
- Painting Is My Therapy
- This is Me! Family Fun Art Project
- Art Day Stress Free Way to Play
- Art Therapy Project: Georgia O’Keeffe Big Flower
- Art Therapy Project: Picasso Abstract Clay Face
- Encourage Art with Cool Art Supplies
- Art from the heart! Meet the Artist Angie
Visit us at: www.facebook.com
This post originally appeared on our May/June 2018 Magazine


